Simple Apple Pie Filling Recipes for Delicious Desserts
Whether you’re planning a cozy family dinner or need a sweet treat for the holidays, knowing how to make delicious apple pie filling is a skill worth mastering. With a few simple ingredients and an easy approach, you’ll have a delightful homemade apple pie filling that can elevate your desserts to the next level. In this post, I’ll share some straightforward apple pie filling recipes that will have everyone coming back for more!
Ingredients & Kitchen Tools
– Ingredients:
– 6-8 medium-sized apples (Granny Smith or Honeycrisp work best)
– ¾ cup granulated sugar
– 2 tablespoons all-purpose flour
– 1 tablespoon lemon juice
– 1 teaspoon ground cinnamon
– ¼ teaspoon nutmeg (optional)
– 1 teaspoon vanilla extract (optional)
– Pinch of salt
– Kitchen Tools:
– Large mixing bowl
– Peeler and knife
– Measuring cups and spoons
– Large saucepan
– Wooden spoon or spatula
Prep & Cook Time
Prep Time: 15 minutes
Cook Time: 10-15 minutes
Total Time: 30 minutes
Step-by-Step Instructions
1. Prepare the Apples: Peel, core, and slice the apples into thin wedges. This ensures they cook evenly and integrate beautifully into your apple pie filling.
2. Mix Dry Ingredients: In a large mixing bowl, combine the granulated sugar, flour, cinnamon, nutmeg (if using), and salt. Stir these ingredients together until evenly mixed.
3. Add Apples: Toss the sliced apples into the bowl with the dry mixture, coating them thoroughly.
4. Add Wet Ingredients: Drizzle the lemon juice and vanilla extract over the apples. Gently stir until all the apple slices are coated with the mixture.
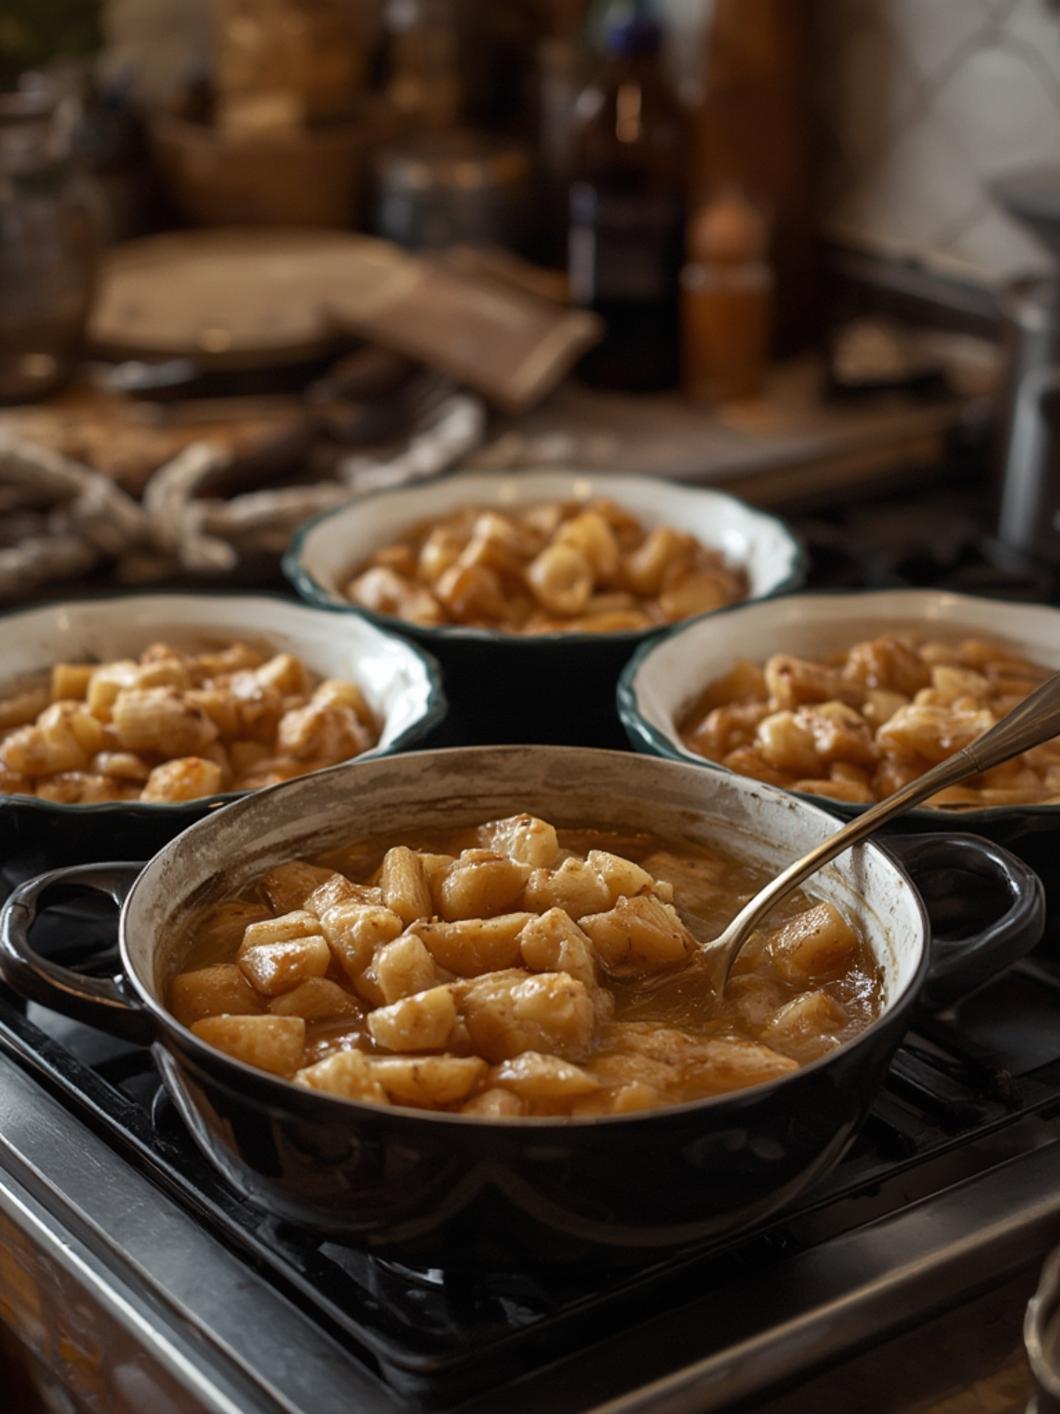
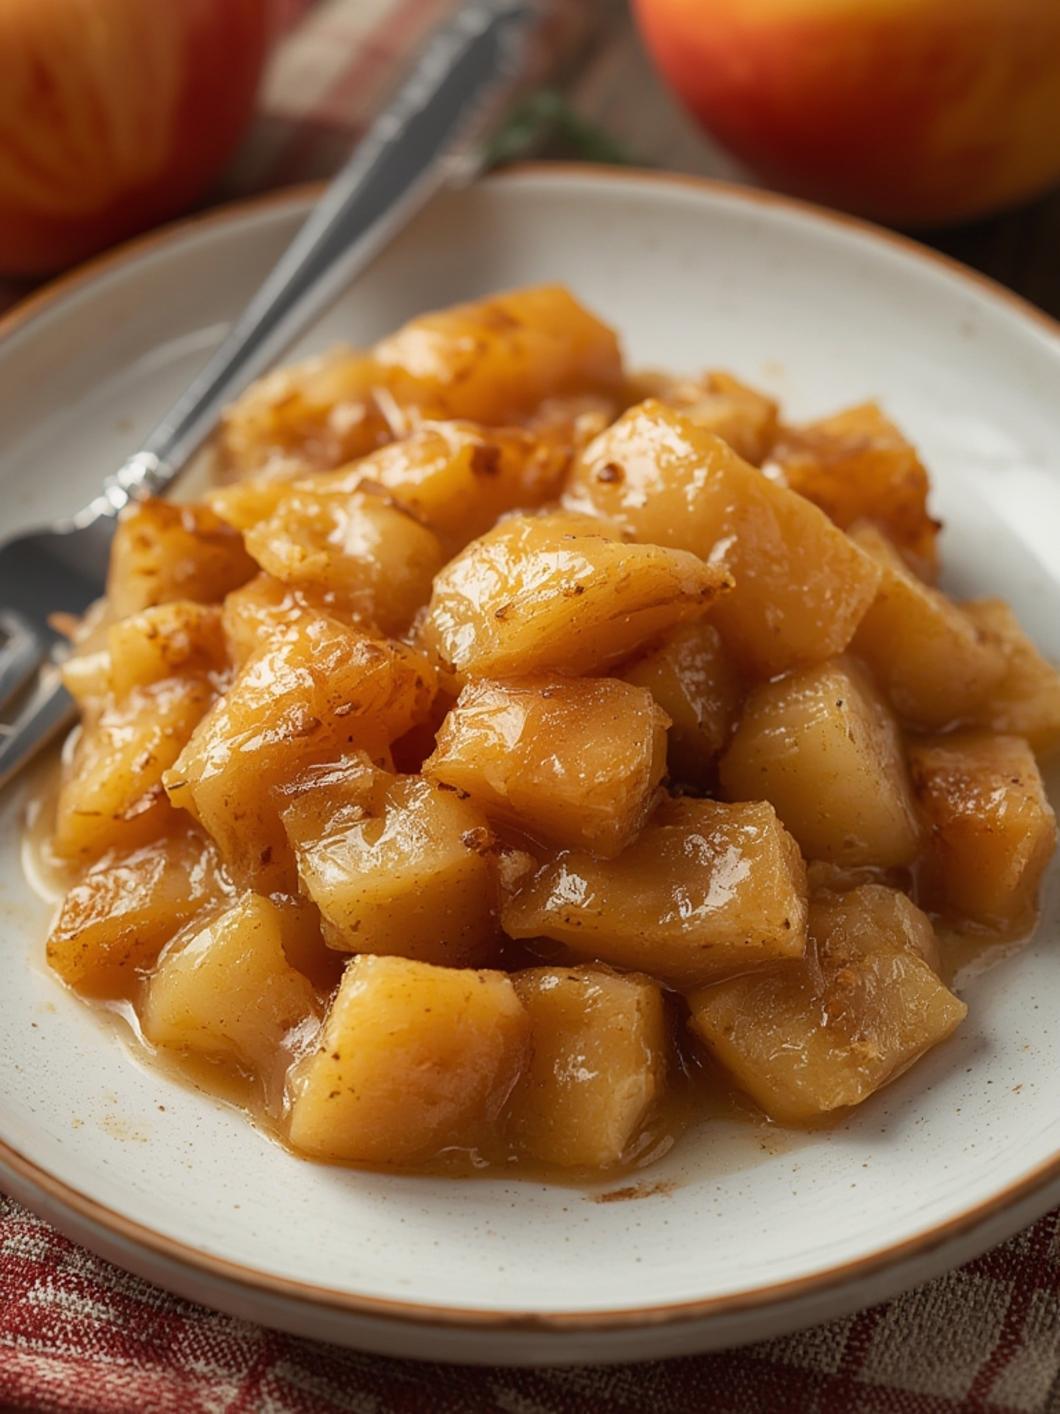
5. Cook the Mixture: In a large saucepan over medium heat, add the apple mixture. Cook for about 10-15 minutes, stirring occasionally, until the apples begin to soften but are not mushy.
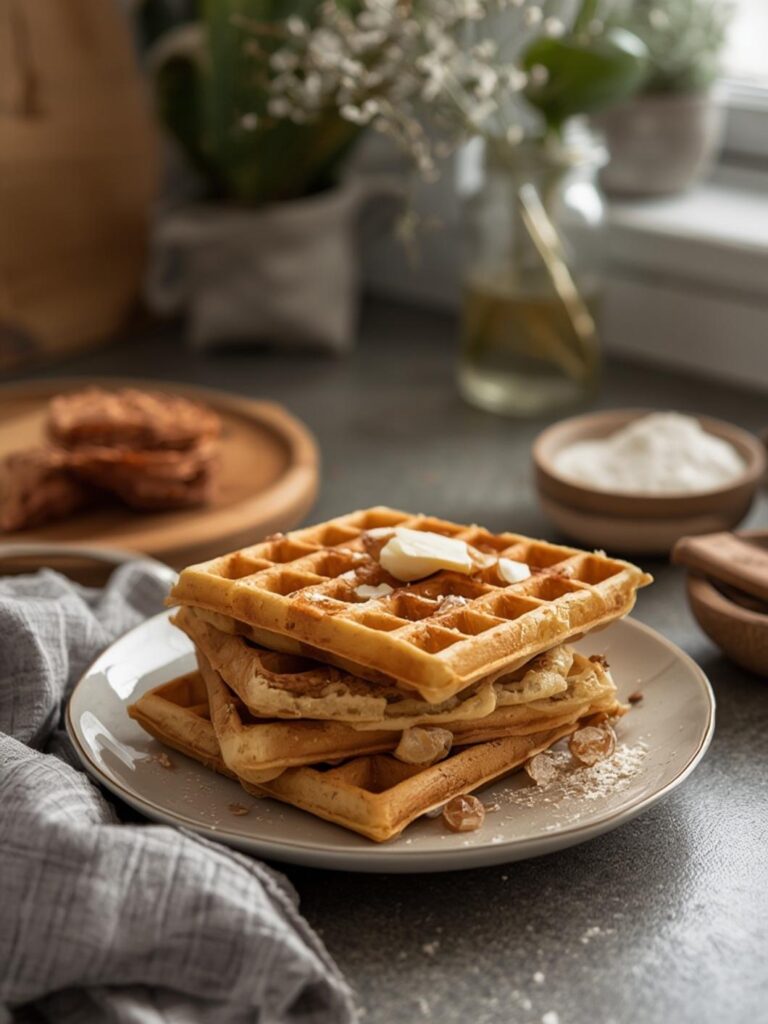
6. Cool and Use: Once cooked, remove the saucepan from heat and allow the apple filling to cool. Use it immediately for pies, tarts, or even as a topping for pancakes and waffles.
Nutritional Benefits or Advantages
Apples are not just delicious but also packed with essential nutrients. They are a great source of dietary fiber, which can aid digestion and help maintain a healthy weight. Apples also provide vitamin C, potassium, and various antioxidants, making homemade apple pie filling a nutritious choice for your desserts.
Tips, Variations, or Substitutions
– Apple Variety: Experiment with different types of apples for varying sweetness and tartness. Combine tart and sweet apples for more complex flavors.
– Add-ins: For a twist, consider adding dried fruit like raisins or cranberries, or a handful of chopped nuts to give your filling crunch.
Common Mistakes to Avoid
– Overcooking the Apples: Keep an eye on your apples during the cooking process. You want them tender but still holding their shape, not mushy.
– Not Adjusting Sweetness: Always taste before adding more sugar. The sweetness of apples can vary significantly.
Storage and Reheating Tips
Store your homemade apple pie filling in an airtight container in the fridge for up to one week. You can also freeze the filling for up to three months. To reheat, simply warm it in a saucepan over low heat or defrost in the fridge overnight before using.
Conclusion
With these simple apple pie filling recipes, you can create a delightful addition to your dessert menu that’s sure to impress. The best part? You can whip it up quickly and customize it to suit your taste. So grab those apples and get started! If you enjoy this recipe, don’t forget to share your creations and leave a comment below.
FAQs
Q: Can I use canned apples?
A: Yes, you can use canned apples, but using fresh apples will give you a more vibrant flavor and better texture.
Q: How can I make this filling without sugar?
A: You can substitute sugar with natural sweeteners like honey or maple syrup, adjusting the quantity to your taste.
Q: Can I use this filling for other desserts?
A: Absolutely! This apple pie filling works wonderfully for tarts, crumbles, or even as a sweet topping for yogurt or oatmeal.
Q: How can I preserve this filling longer?
A: If you want to store your filling longer, consider freezing it in portions to enjoy later on without compromising flavor.