Best Way to Make Homemade Butter in Minutes
Making homemade butter is a delightful, straightforward process that can be done in mere minutes! With just a few simple ingredients and tools, you can create a creamy, luscious spread that’s far superior to store-bought options. This homemade butter recipe will not only satisfy your taste buds but also add a personal touch to your meals.
Ingredients & Kitchen Tools
To get started on your journey to homemade butter, here’s what you’ll need:
– Ingredients:
– 1 pint of heavy cream (organic if possible)
– Salt (to taste, optional)
– Kitchen Tools:
– Stand mixer or hand mixer
– Bowl (preferably a large one to catch splatters)
– Strainer or cheesecloth
– Wooden spoon or spatula for mixing (if needed)
– Airtight container for storage
Prep & Cook Time
– Prep Time: 5 minutes
– Cook Time: 5-10 minutes
– Total Time: 15 minutes

Step-by-Step Instructions
1. Pour the Cream: Start by pouring your heavy cream into the mixing bowl. If you’re using a stand mixer, attach the whisk; otherwise, use the beaters for a hand mixer.
2. Beat the Cream: Begin mixing on a medium speed. Within a few minutes, you’ll notice the cream whipped into soft peaks, similar to whipped cream. Continue mixing past this stage.
3. Watch for Separation: Keep beating until the cream thickens and starts to separate. This can take about 5 to 10 minutes. You might see the buttermilk (liquid) separating from the butter (solid).
4. Strain the Buttermilk: Once separation occurs, turn off the mixer. Use a strainer or cheesecloth to catch the solid butter while letting the buttermilk drain into the bowl below. You can save the buttermilk for baking or cooking!
5. Rinse the Butter: Rinse the solid butter under cold water to wash away any remaining buttermilk. This step is crucial as it helps the butter to last longer.
6. Add Salt (Optional): If you like salted butter, now is the time to add salt. Mix well with a wooden spoon or spatula to distribute evenly.
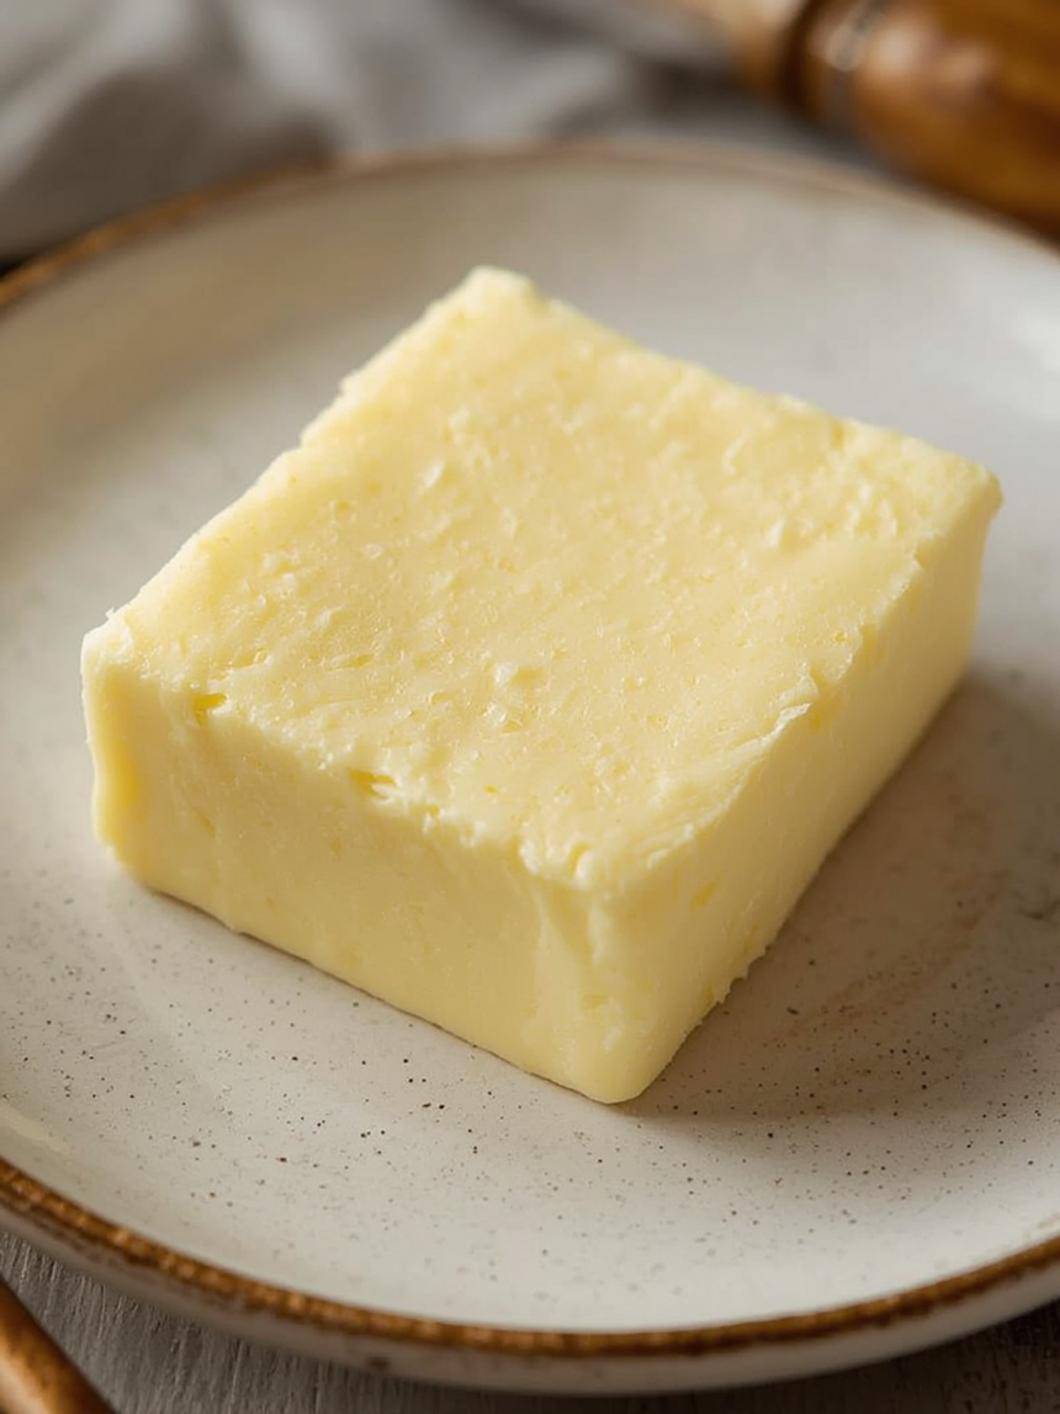
7. Store: Transfer your homemade butter into an airtight container. Your delicious creation is ready to enjoy!
Nutritional Benefits or Advantages
Making homemade butter not only allows you to control the ingredients but also means you can avoid preservatives and artificial flavors found in many store-bought products. Heavy cream is rich in vitamins A, D, and E, and it contains healthy fats that are essential for a balanced diet. Plus, using fresh homemade butter can elevate your dishes and baking endeavors!
Tips, Variations, or Substitutions
– Flavoring Options: Try adding herbs like rosemary or garlic for a savory spread. For sweet variations, consider mixing in honey or cinnamon.
– Dairy Alternatives: If you’re looking for a non-dairy option, consider using coconut cream, though the taste will differ.
Common Mistakes to Avoid
– Overbeating: If you stop mixing too soon, you won’t achieve that desirable butter consistency. Conversely, overbeating can turn your butter into butter solids, so watch your mixing time!
– Skipping Cold Water Rinse: Failing to rinse adequately may lead to the butter spoiling sooner due to residual buttermilk.
Storage and Reheating Tips
Store your homemade butter in the refrigerator for up to two weeks. If you want it to last longer, consider freezing it. Simply portion the butter and wrap it tightly in plastic wrap before placing it in a freezer-safe container.
Conclusion with Call-to-Action
Homemade butter is incredibly easy to make and so satisfying. Once you’ve made your first batch, you may never go back to store-bought again! Try this homemade butter recipe, and let your culinary creativity shine. Share your creations with friends, or use it as a thoughtful gift for your loved ones!
FAQs
1. Can I use low-fat cream?
– While low-fat cream can be used, it won’t yield the same creamy texture and flavor as heavy cream.
2. How can I tell when my butter is ready?
– Your butter is ready when the mixture has separated into solid and liquid; the solid should look creamy.
3. Can I make flavored butter?
– Absolutely! Feel free to experiment with different herbs, spices, or sweeteners based on your preferences.
4. What can I do with leftover buttermilk?
– Leftover buttermilk is perfect for pancakes, cakes, or even salad dressings!