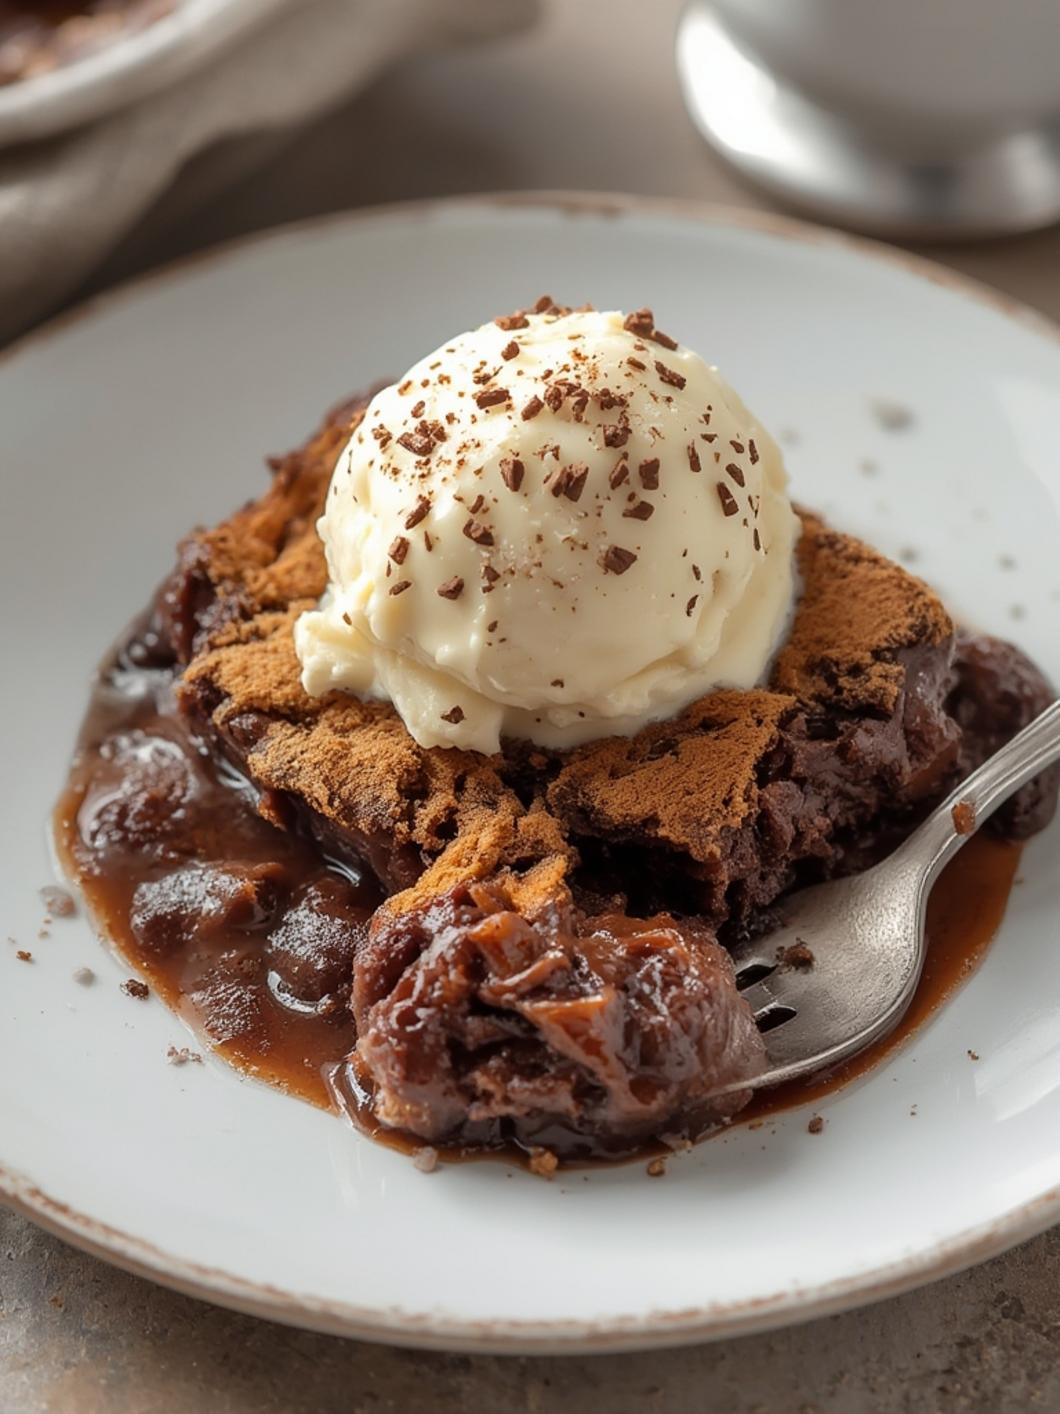
Easy Chocolate Cobbler Recipe Everyone Will Love
Chocolate Cobbler is a delightful dessert that captures the hearts of chocolate lovers everywhere. Imagine digging your spoon into a warm, fudgy chocolate cake that sits on a rich layer of chocolate sauce—this is exactly what you get with this easy recipe! Perfect for gatherings or a cozy night in, this Chocolate Dessert is sure to impress your family and friends. Let’s get started on creating this sweet treat everyone will love!
Ingredients & Kitchen Tools
Ingredients:
– 1 cup all-purpose flour
– 1 cup granulated sugar
– 2 teaspoons baking powder
– ½ teaspoon salt
– 1 cup milk
– ½ cup unsweetened cocoa powder
– ½ cup unsalted butter, melted
– 1 teaspoon vanilla extract
– 1 cup brown sugar
– 1 ½ cups hot water
Kitchen Tools:
– Mixing bowls
– Whisk
– 9×13 inch baking dish
– Measuring cups and spoons
– Oven mitts
Prep & Cook Time
– Prep Time: 15 minutes
– Cook Time: 30-35 minutes
– Total Time: 45-50 minutes
Step-by-Step Instructions
1. Preheat your oven to 350°F (180°C). This will ensure your Chocolate Cobbler cooks evenly.
2. In a mixing bowl, combine the flour, granulated sugar, baking powder, and salt. Whisk together until well mixed.
3. Add the milk, melted butter, and vanilla extract to the dry ingredients. Stir until the batter is just combined—don’t worry about a few lumps!
4. Pour the batter into a greased 9×13 inch baking dish. Spread it out evenly.
5. In a separate bowl, mix the cocoa powder and brown sugar together. Gradually sprinkle this mixture over the top of the batter you just poured in the dish.
6. Pour the hot water over the entire dish. Do not stir! This might seem unusual, but it will create that wonderful saucy bottom for your cobbler.
7. Bake in the preheated oven for about 30-35 minutes, or until the top has set slightly. The edges should be firm, while the center stays gooey.
8. Allow to cool for a few minutes, then serve warm. The perfect accompaniment is a scoop of vanilla ice cream on top!
Nutritional Benefits or Advantages
This Chocolate Cobbler has a few benefits, mainly if enjoyed in moderation. Cocoa powder is rich in antioxidants and may promote heart health. The use of whole milk helps provide calcium and protein. Additionally, you can adjust the sugar according to your preference by using less or opting for alternatives like coconut sugar.
Tips, Variations, or Substitutions
– Gluten-free: Substitute all-purpose flour with a gluten-free flour blend.
– Dairy-free: Swap regular milk with almond or oat milk and use a dairy-free butter substitute.
– Add-ins: For a fun twist, consider adding chopped nuts or chocolate chips into the batter before baking!
Common Mistakes to Avoid
– Overmixing the batter: This can lead to a dense and tough cobbler. Mix just until combined.
– Not using hot water: This is crucial for creating a rich, chocolatey sauce at the bottom. So don’t skip this step!
Storage and Reheating Tips
To store your leftover Chocolate Cobbler, cover it with plastic wrap or foil and keep it in the fridge for up to 3 days. When you’re ready to enjoy it again, simply reheat it in the microwave for about 20-30 seconds, or until warmed through.
Conclusion with Call-to-Action
This Easy Chocolate Cobbler is not only delicious but also incredibly simple to make. Whether you’re hosting a dinner party or just indulging in a sweet treat at home, this Chocolate Dessert is sure to leave everyone wanting more. Don’t forget to try it with ice cream, and let me know your thoughts in the comments below!
FAQs
1. Can I make this Chocolate Cobbler ahead of time?
Yes! You can prepare the batter and store it in the fridge; just bake it fresh when you’re ready.
2. What can I serve with Chocolate Cobbler?
A scoop of vanilla ice cream, whipped cream, or fresh berries are great choices!
3. Is it okay to double the recipe?
Absolutely! Just make sure to use a larger baking dish and adjust the cooking time as necessary.
4. Can I freeze Chocolate Cobbler?
While it’s best enjoyed fresh, you can freeze it after baking. Just ensure it’s well-sealed to avoid freezer burn. Reheat from frozen for best results.