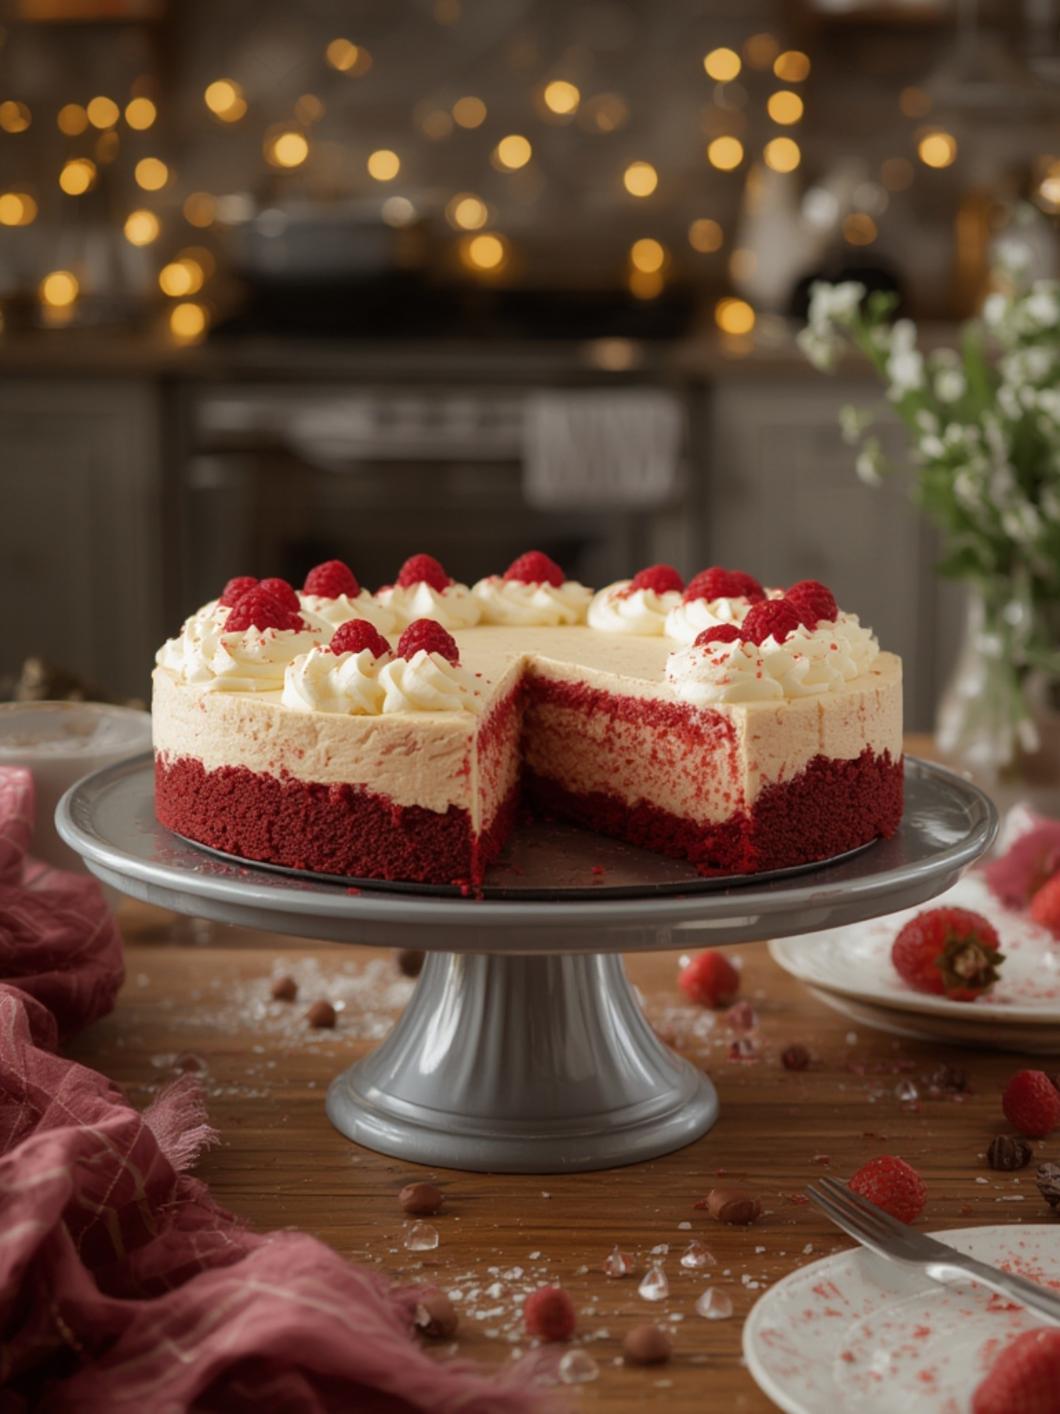
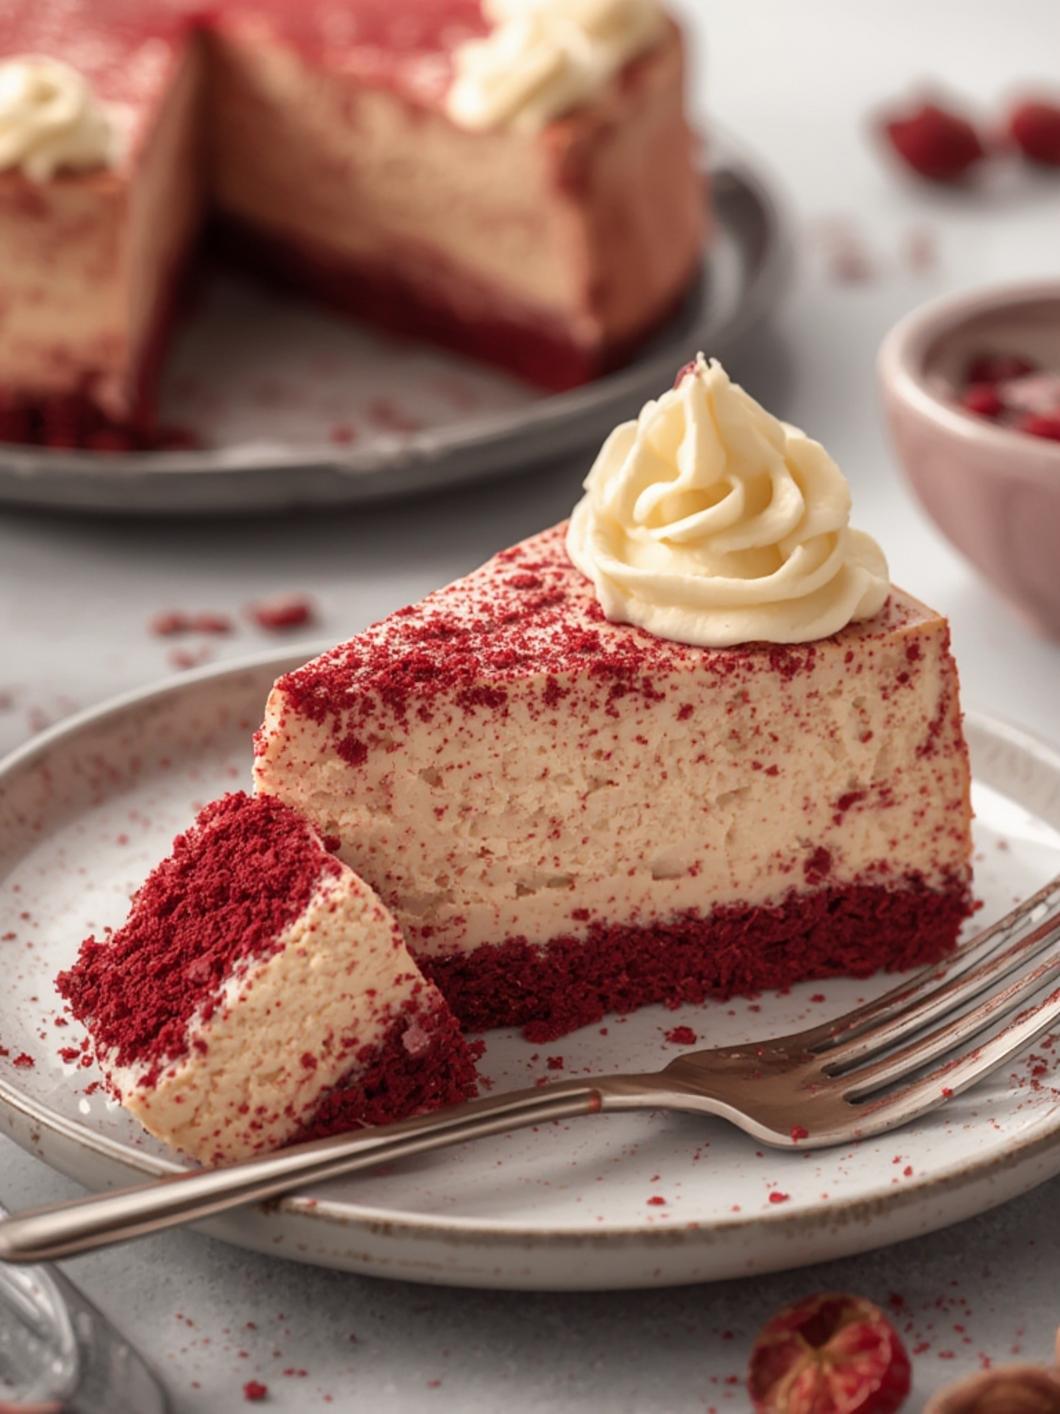
Easy Red Velvet Cheesecake in 5 Simple Steps
Are you ready to take your dessert game to the next level? This Easy Red Velvet Cheesecake combines the classic charm of red velvet cake with the luxurious creaminess of cheesecake. Whether you’re celebrating a special occasion or just indulging for the weekend, this dessert is bound to impress. Let’s embrace the vibrant colors and rich tastes in just five simple steps!
Ingredients & Kitchen Tools
Ingredients:
– For the Red Velvet Cake Layer:
– 1 ¼ cups all-purpose flour
– 1 cup granulated sugar
– 1 teaspoon baking soda
– ½ teaspoon salt
– 1 teaspoon cocoa powder
– 1 cup vegetable oil
– 1 cup buttermilk (or milk with a tablespoon of vinegar)
– 2 large eggs
– 2 tablespoons red food coloring
– 1 teaspoon vanilla extract
– 1 teaspoon white vinegar
– For the Cheesecake Layer:
– 16 oz. (450 g) cream cheese, softened
– ½ cup granulated sugar
– 2 large eggs
– 1 teaspoon vanilla extract
– 1 tablespoon all-purpose flour (optional for thicker texture)
Kitchen Tools:
– 9-inch springform pan
– Mixing bowls
– Hand mixer or stand mixer
– Rubber spatula
– Measuring cups and spoons
Prep & Cook Time
– Prep Time: 30 minutes
– Cook Time: 45 minutes
– Cooling Time: 4 hours (or overnight)
Step-by-Step Instructions
1. Prepare the Red Velvet Cake Layer:
Preheat your oven to 350°F (175°C). In a large bowl, mix flour, sugar, baking soda, salt, and cocoa powder. In another bowl, combine vegetable oil, buttermilk, eggs, red food coloring, vanilla, and vinegar. Gradually mix the dry ingredients into the wet ingredients until fully combined. Pour the batter into a greased 9-inch springform pan.
2. Bake the Cake Layer:
Bake the red velvet cake in the preheated oven for 25-30 minutes or until a toothpick inserted in the center comes out clean. Allow it to cool completely in the pan.
3. Prepare the Cheesecake Filling:
While the cake cools, beat the softened cream cheese in a mixing bowl until smooth. Gradually beat in sugar, followed by eggs and vanilla extract. If you prefer a thicker texture, add flour and mix until combined.
4. Assemble the Cake:
Once the red velvet layer has cooled, pour the cheesecake filling over the top. Spread it evenly. Return the springform pan to the oven and bake for an additional 30-35 minutes or until the cheesecake is set but slightly wobbly in the center.
5. Cool and Serve:
After baking, turn off the oven and leave the cheesecake in for another hour. Remove and let it cool at room temperature for 30 minutes before transferring to the refrigerator. Chill for at least 4 hours (overnight for best results) before serving.
Nutritional Benefits or Advantages
This Red Velvet Cheesecake offers more than just indulgence! With its rich cream cheese filling, you gain the benefits of calcium and protein, essential for strong bones and muscles. The addition of buttermilk can promote gut health, while the antioxidants in cocoa provide a delicious boost!
Tips, Variations, or Substitutions
– For a gluten-free version, substitute all-purpose flour with a gluten-free baking blend.
– If you don’t have buttermilk on hand, you can easily make your own by mixing regular milk with a tablespoon of vinegar and letting it sit for 5-10 minutes.
– Top the cheesecake with whipped cream, fresh berries, or a drizzle of chocolate sauce for an extra flair!
Common Mistakes to Avoid
– Ensure that all ingredients are at room temperature for better mixing and a smooth batter.
– Don’t open the oven door frequently while baking, as this may cause the cheesecake to crack.
– Allow the cheesecake to cool completely before refrigerating; this prevents condensation.
Storage and Reheating Tips
Store any leftover Red Velvet Cheesecake in an airtight container in the fridge. It should last for up to 5 days. For individual slices, wrap them in plastic wrap and freeze for up to 3 months. Thaw in the refrigerator before serving.
Conclusion
This Easy Red Velvet Cheesecake is a delightful addition to any dessert table, combining the classic flavors of red velvet cake with the creamy richness of cheesecake. Give it a try, and your friends and family will be raving about it! Don’t forget to share your beautiful creations on social media!
FAQs
Q: Can I make this cheesecake ahead of time?
A: Absolutely! It’s best to prepare the cheesecake the day before serving for optimal flavor.
Q: Can I use a different color for the cake?
A: Yes! You can substitute the red food coloring with any gel food coloring to create other vibrant colors.
Q: How do I prevent my cheesecake from cracking?
A: To prevent cracking, ensure all ingredients are at room temperature, and avoid sudden temperature changes after baking.
Q: Is there a dairy-free option?
A: Yes, you can substitute cream cheese with dairy-free alternatives and use plant-based milk for the cake layer.